


Action Plan
|
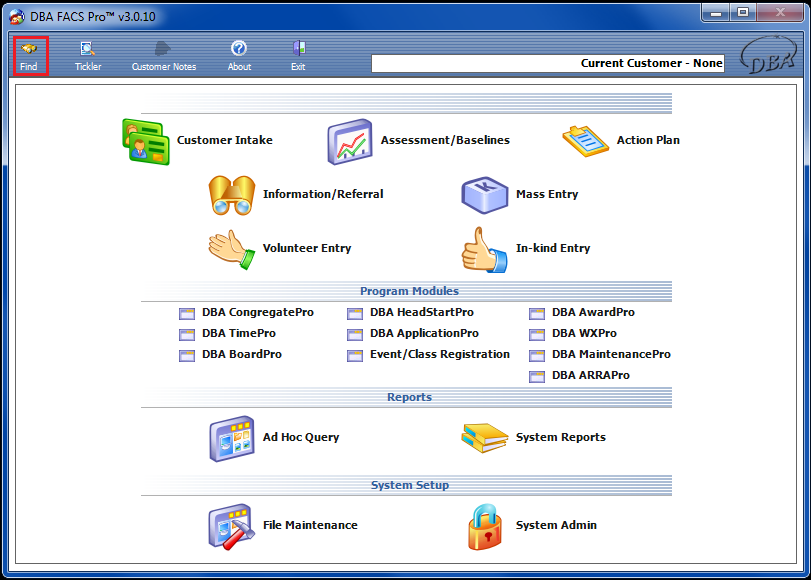
To enter or view Action Plans in Customer Intake, first click the Find Icon. |
|
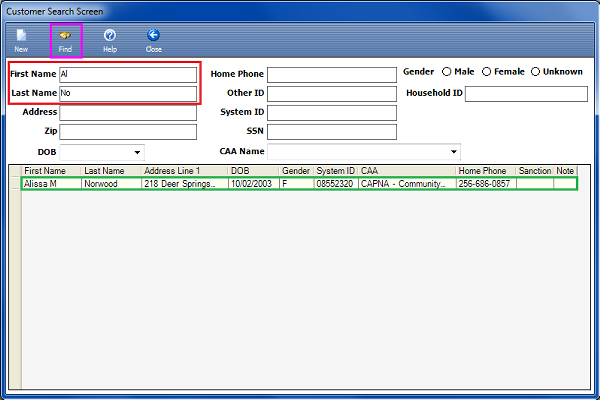
This will bring up the Customer Search Screen, where the user may enter search criteria to search for a customer.Fill in the first letter of the first name and first 3 letters of the last name so the search criteria isn't too broad or too narrow. If you aren't sure if someone is in the system already, do not search by SSN# because someone else may have entered an incorrect SSN# and then a duplicate customer could be created. Once the criteria have been entered, click the Find icon once more to search the system. After the search results have come up, double click the appropriate customer. |
|
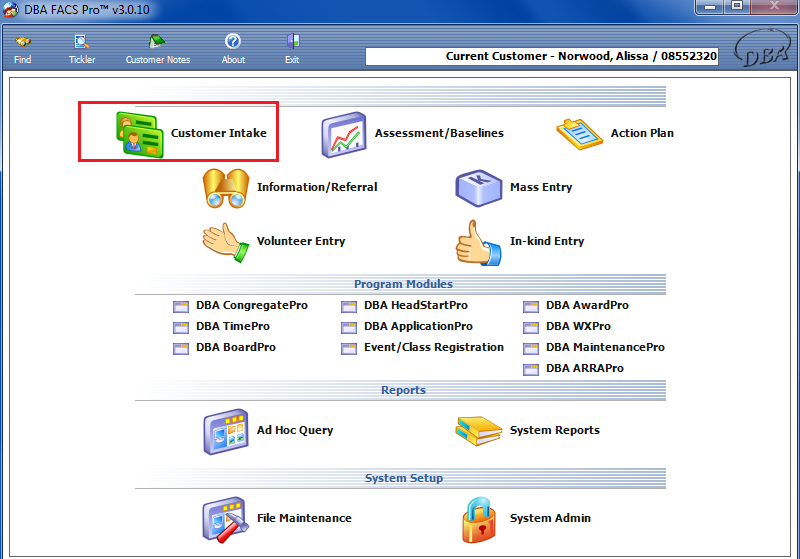
This will take you to the Main Menu. Open the address screen by clicking on the Customer Intake icon. NOTE: If the Address screen is already up and you search for a different customer and double click on their name, the Address screen will remain, but with the second customer's information instead of the first customer's. |
|
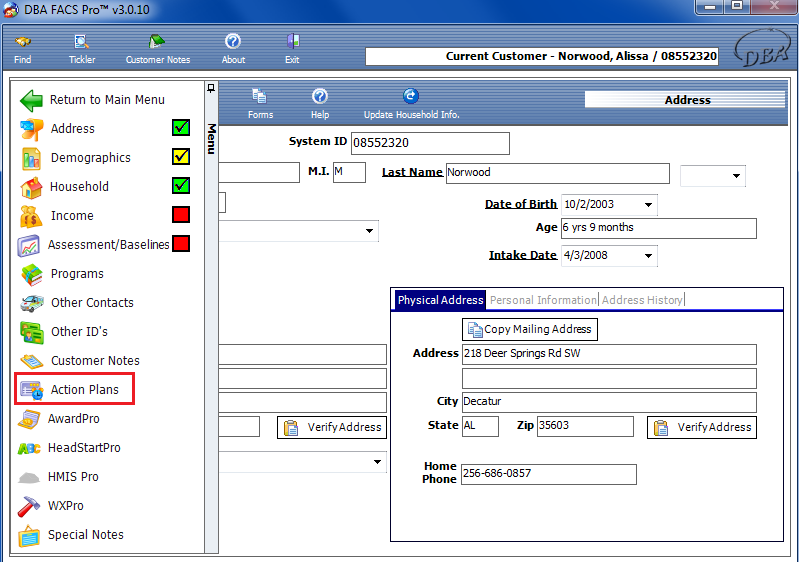
Once on the Adress Screen, open the Menu sidebar by hovering the mouse over it and click on the Action Plans icon. Once you have a customer selected from the Find screen, you can also get to the Action Plan screen from the Main Menu in the system. |
|
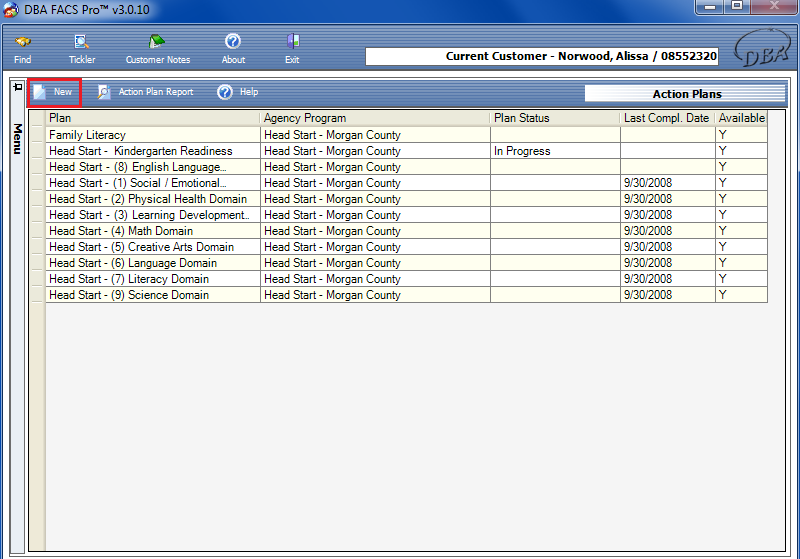
The Action Plans screen is where all previous Action Plans are featured in a table. If you wish to enter a new Action Plan, simply click on the New icon. If your state utilizes the Program Calculator you won't use this step because the Program Calculator will create the Action Plan for you automatically as long as the customer is eligible. |
|
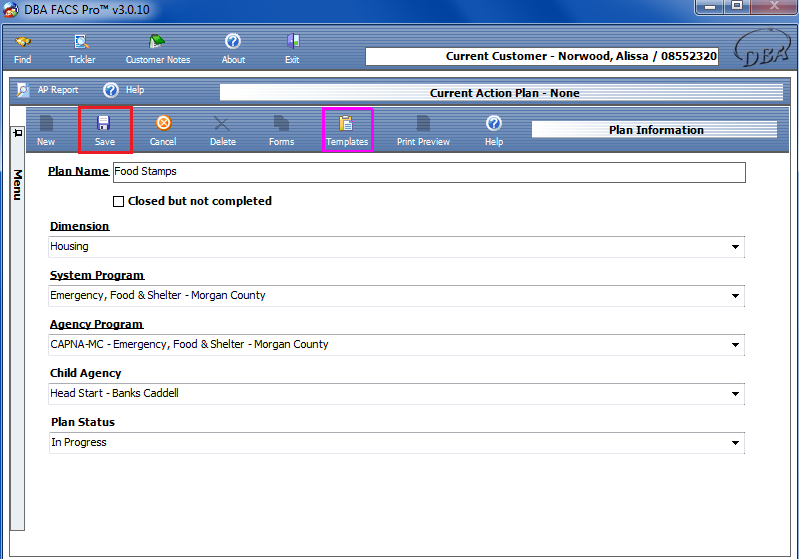
This will take you to the Plan Information screen, where information such as Plan Name, Dimension, System Program, Agency Program, Site, and Plan Status may be entered. You must first select the Dimension. This is because by this choice, the system will automatically list choices pertaining to that specific Dimension under System Program. The same holds true for System Program, Agency Program, and Child Agency. Click the Save Icon after all information has been entered.
If your state does not utilize the Program Calculator, you can hit the Template button on the toolbar to view Action Plan templates for the program you are trying to enroll the customer in. This will fill in the Dimension and System Program automatically and also create the Tasks and Interventions setup for this Action Plan. |
|
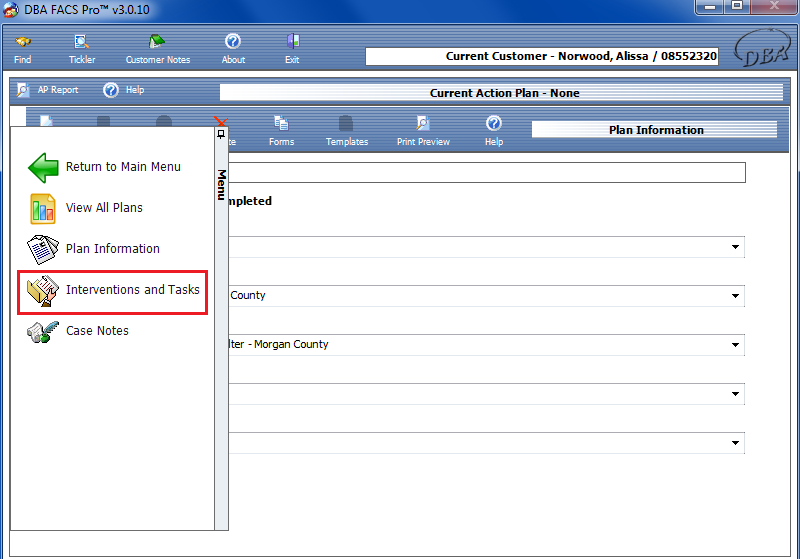
Open the menu sidebar and click the Interventions and Tasks icon. |
|
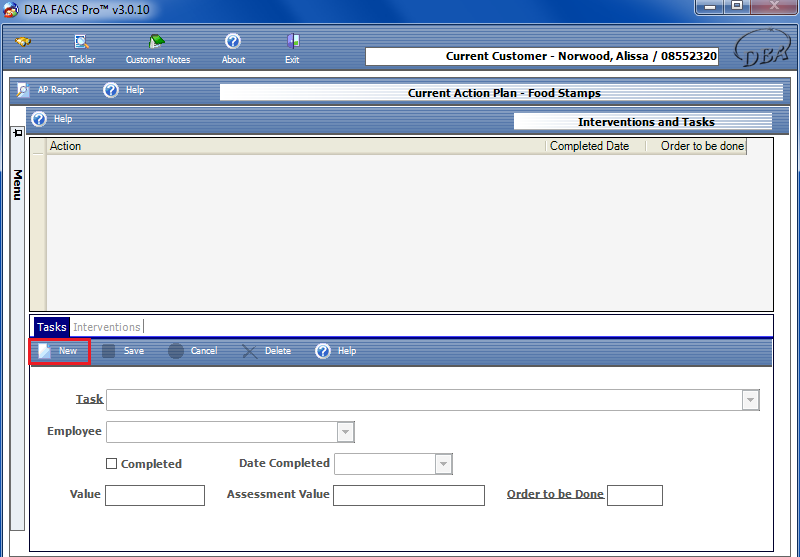
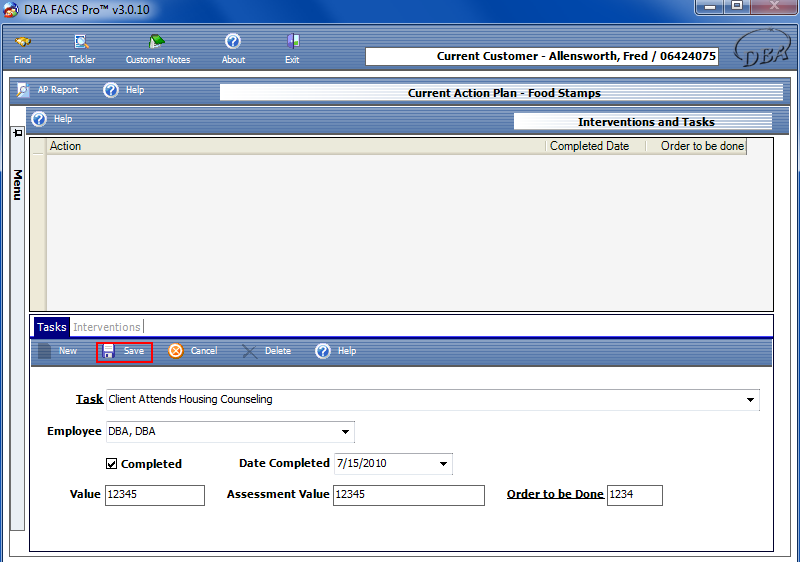
This will take you to the Interventions and Tasks screen, where interventions and tasks are entered and may be viewed. To activate the bottom half of the screen, click the New icon. You may now enter your Task. Tasks and Interventions will be automatically added if the Action Plan was added through the Program Calculator or by using a Template. |
|
After all of the information has been entered, including the Task, Employee, Value, Notes, whether or not it has been completed, Date Completed, and Order to be Done, click the Save icon. Remember that all underlined information must be completed in order to save. The newly added Task will appear in the table in the top half of the screen.
The Order to be Done is just used to determine what order to show all of the items in the grid up top and on reports. So the item labeled as 1 for Order to be Done will show up before the item with 2 and so on. If you enter a number that is already in use, then the new one will take over that number and everything else will move down 1. |
|
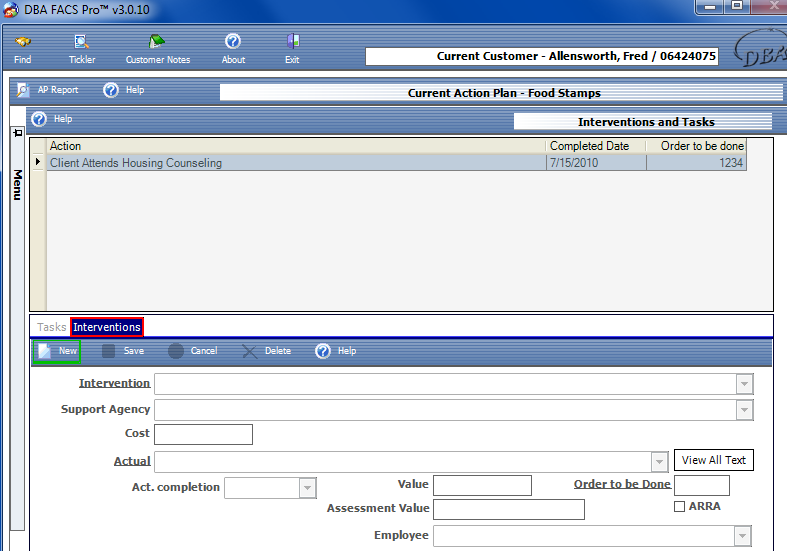
After the Task has been entered into the table above, click the Interventions tab. This will change the bottom of the screen with new fields of information, this time pertaining to Interventions. To activate this new portion of the screen, click the New icon. |
|
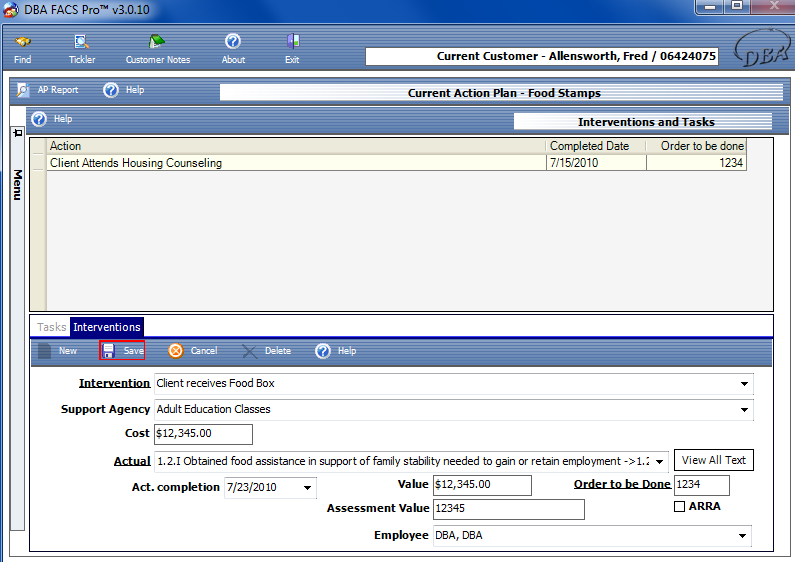
After all of the information has been entered (Intervention, Support Agency, Cost, Actual, Act. completion, Value, and Order to be Done), click the Save icon to save all information. This will add the new Intervention entry to the table above as well.
The Value and Cost fields are the most commonly left blank, but if your Agency wants to associate a Value or Cost with an Outcome you can.
The Order to be Done is just used to determine what order to show all of the items in the grid up top and on reports. So the item labeled as 1 for Order to be Done will show up before the item with 2 and so on. If you enter a number that is already in use, then the new one will take over that number and everything else will move down 1.
You can click the View All Text button to see the entire text of the outcome if it is cutoff in the dropdown. Also, from the screen that comes up to show all text you can select the outcome by double clicking it there. |
|
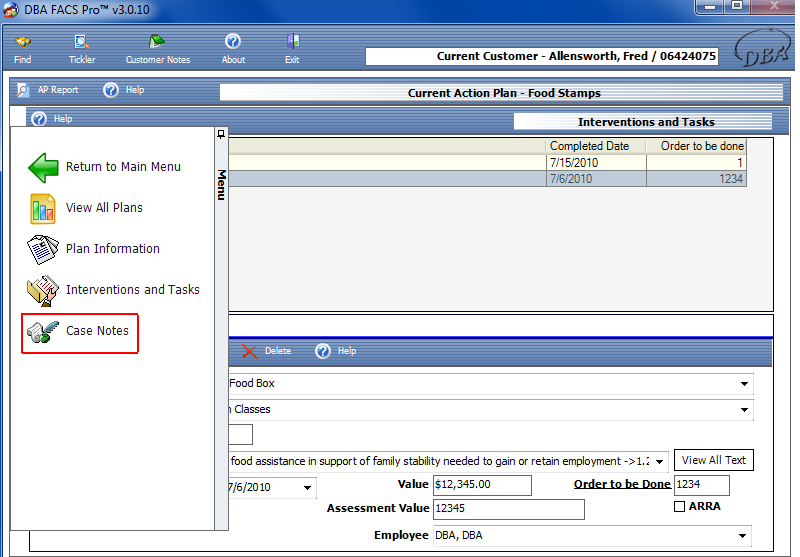
Open the menu sidebar and click the Case Notes icon. |
|
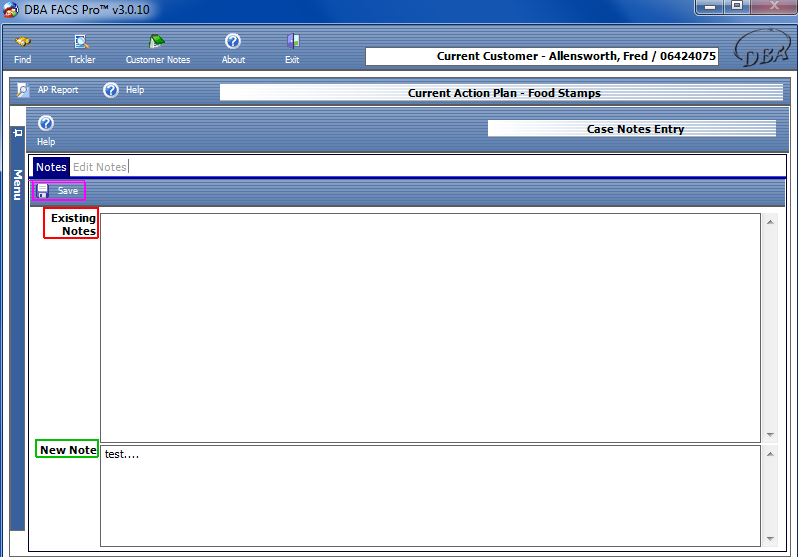
This will bring up the Notes screen, where Existing Notes may be viewed and New Notes added. To add a New Note, simply begin typing in the bottom box, labeled New Note and click the Save icon when you are done. This will add the New Note under Existing Notes.
Case Notes can actually only be viewed by the Agency that created the Action Plan and also only by Users at the Agency who have access to that System Program. Notes can only be edited by Super User's so be careful with what is entered. If there's a small error, just create another note amending the previous note. If there is something that CAN'T be in there, then e-mail the help desk. |