


Action Plan
|
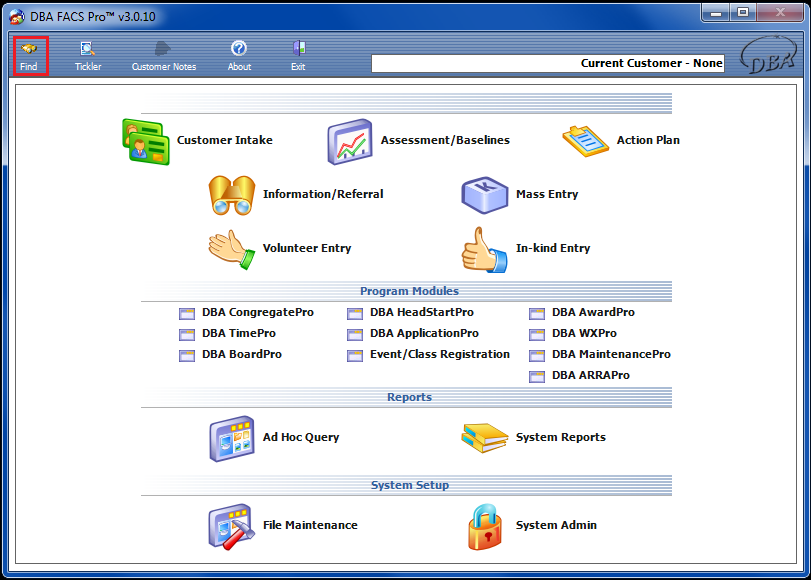
To enter or view Action Plans in Customer Intake, first click the Find Icon. |

|
This will bring up the Customer Search Screen, where the user may enter search criteria to search for a customer. Once the criteria have been entered, click the Find icon once more to search the system. |

|
After the search results have come up, double click the appropriate customer. |

|
This will take you to the Address Screen for the current customer. Open the menu sidebar by waving your mouse over it for a couple of seconds, and click on the Action Plans Icon. |

|
This will take you to the Action Plans screen, where all previous Action Plans are featured in a table. If you wish to enter a new Action Plan, simply click on the New Icon. |

|
This will take you to the Plan Information screen, where information such as Plan Name, Dimension, System Program, Agency Program, Site, and Plan Status may be entered. You must first select the Dimension. This is because by this choice, the system will automatically list choices pertaining to that specific Dimension under System Program. The same holds true for System Program and Agency Program, and Agency Program and Site. Click the Save Icon after all information has been entered. |

|
After you have saved the Plan Information, open the menu sidebar and click the Interventions and Tasks icon. |

|
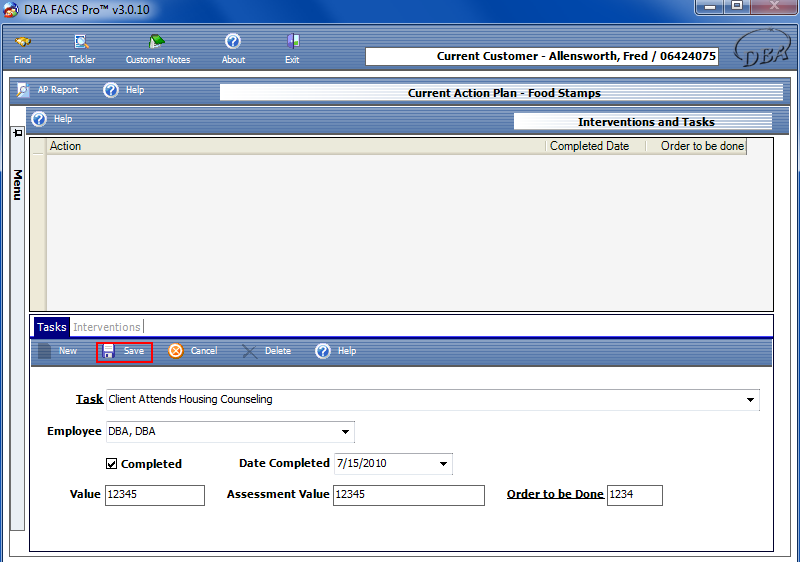
This will take you to the Interventions and Tasks screen, where interventions and tasks are entered and may be viewed. To activate the bottom half of the screen, click the New Icon. You may now enter your Task. |
|
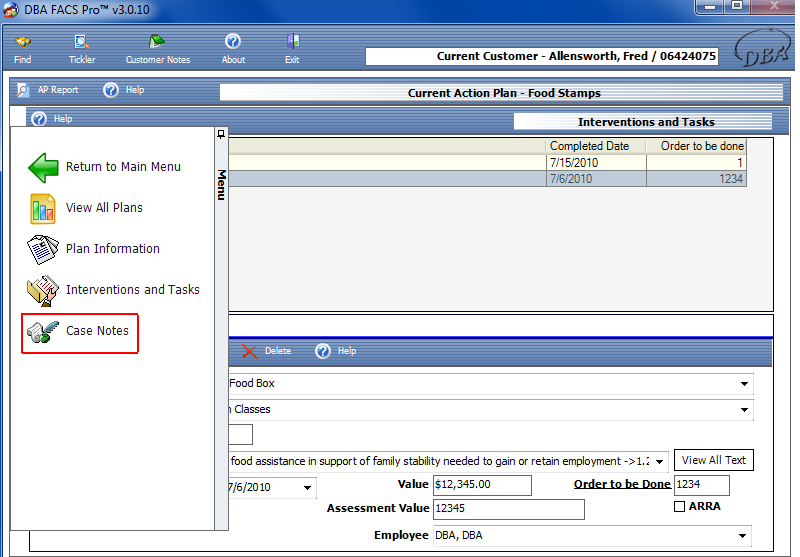
After all of the information has been entered, including the Task, Employee, Value, Notes, whether or not it has been completed, Date Completed, and Order to be Done, click the Save Icon. Remember that all underlined information must be completed in order to save. The newly added Task will appear in the table in the top half of the screen. |
|
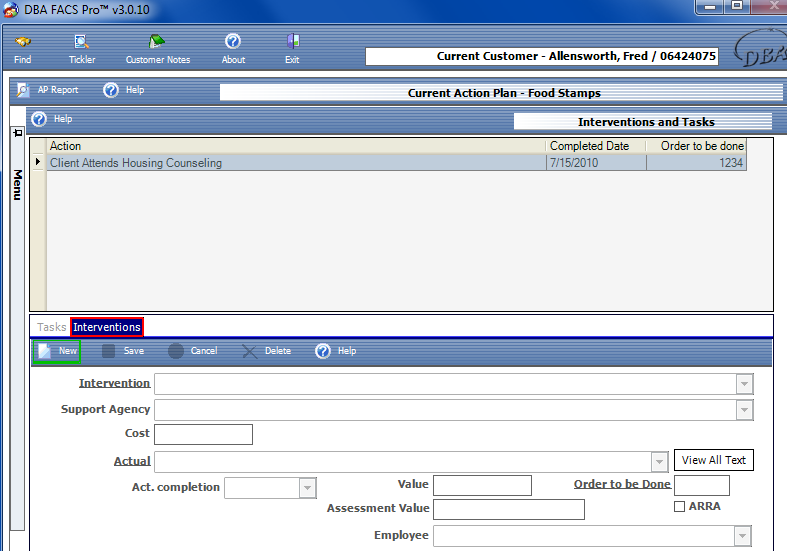
After the Task has been entered into the table above, click the Interventions Tab. This will change the bottom of the screen with new fields of information, this time pertaining to Interventions. To activate this new portion of the screen, click the New Icon. |
|
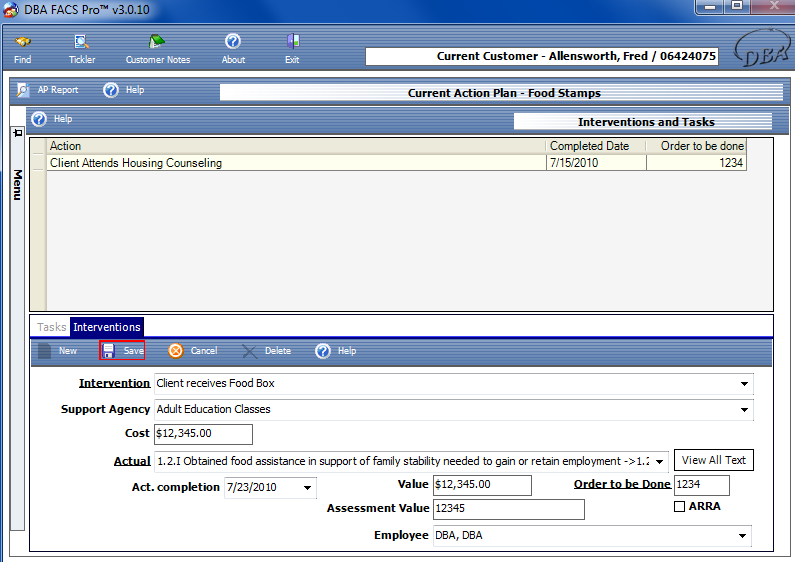
After all of the information has been entered (Intervention, Support Agency, Cost, Actual, Act. completion, Value, and Order to be Done), click the Save Icon to save all information. |

|
This will add the new Intervention entry to the table above as well. |
|
After saving the Intervention information, open the menu sidebar and click the Case Notes Icon. |
|
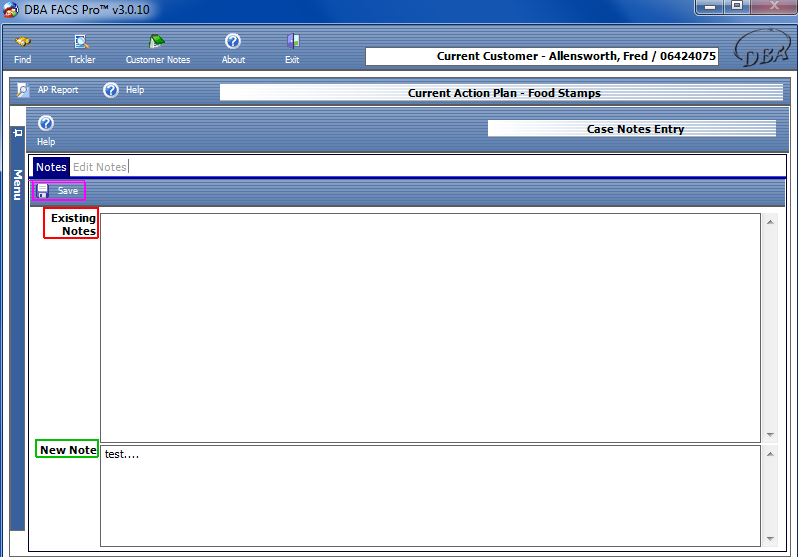
This will bring up the Notes screen, where Existing Notes may be viewed and New Notes added. To add a New Note, simply begin typing in the bottom box, labeled ‘New Note’, and click the Save Icon when you are done. This will add the New Note under Existing Notes.
Remember, these notes may be viewed by all other users in the system. Do NOT enter confidential or personal information in this section. |